HotSpot
Hotspot module
How to
The module is a powerful system MikroTik HotSpot -> user authorization. Ideal for hotels, offices, cafes, and other places where Internet access is required via Web authorization (via HotSpot gateway). The Hotspot module supports various types of authorization - authorization via SMS, creating tickets with different rights and times. In order for the module to work, it is necessary to make sure that it is installed and running in Settings:
The interface of the hotspot module provides different tabs for regular tasks with wifi users and configuration hotspot on RouterOS devices. There are Users, Operators, Points, Gateways, Events, and Reports tabs.
Basic HotSpot gateway configuration on Mikrotik RouterOS
This paragraph does not apply to the description of the Hotspot module but contains information on configuring MikroTik ROS as a HotSpot gateway.
- Make sure that your router, which will act as a HotSpot gateway, is configured and has Internet access.
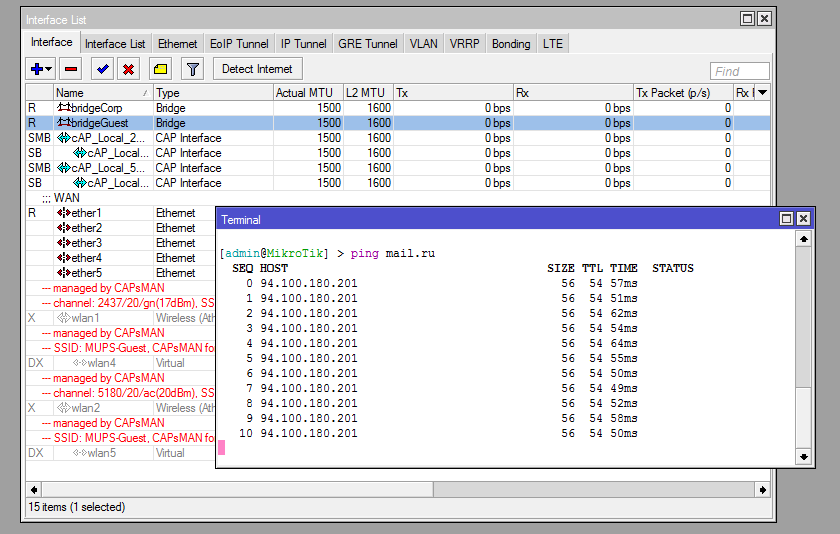
- In our example, the router is configured and has Internet access. We will configure HotSpot on the "bridgeGuest" Interface.
- The HotSpot package must be installed on your router - this can be seen in the System -> packages tab.
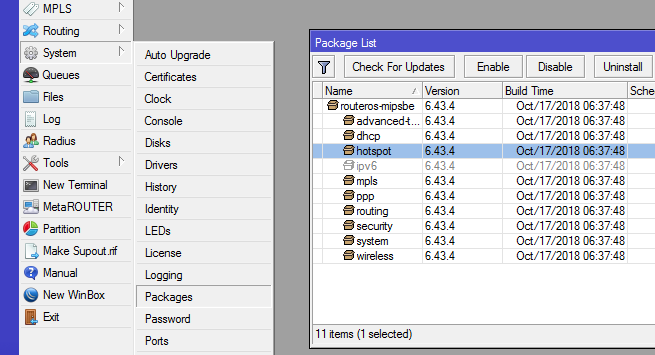
- If the package is missing, download it (hotspot.npk), but always the same version as the system package. You need to install the package to the root (files), after which you need to reboot the router. Check that the package is installed.


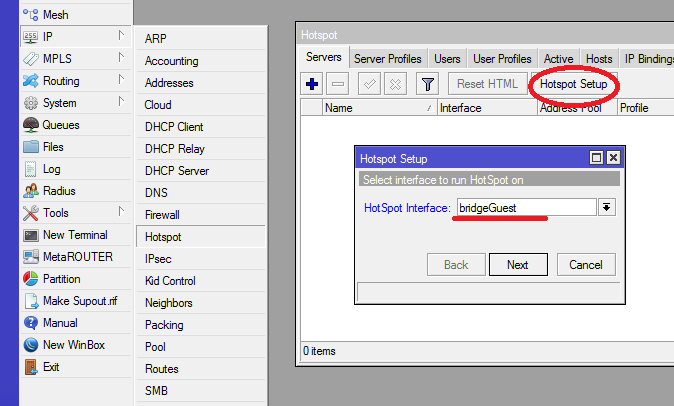
To configure HotSpot go to the system - hotspot section
- For quick setup, use the setup button, after a "wizard" will be launched to configure the hotspot. You need to define the interface behind which your hotspot users will be located.
- For a more accurate configuration, an IP address must be registered on the HotSpot interface. It is this IP that will be automatically substituted when configuring HotSpot, if there is no IP address on the interface, the "wizard" will come up with it and substitute it.

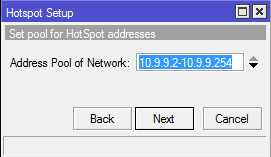
- You will be automatically prompted to create a Pool IP addresses for distribution to clients.
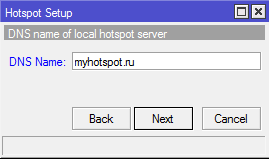
- If you do not fill in the DNS Name field, then when users connect to the authorization page, the IP address of the interface will appear. If you specify a name, then it will be displayed.
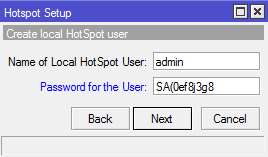
- You are prompted to create your first HotSpot user.
- Congratulations! You have HotSpot configured.


Users
When you click on the Users tab, you will see the following window:

There are 5 buttons on the Users tab:
 - Add user on hotspot RouterOS and mupsbox database
 - Delete user account on hotspot RouterOS and the Mupsbox database marks user account as deleted
 - Enable user on hotspot RouterOS
  - Disable user on hotspot RouterOS
  - Refresh window
There are filtering checkboxes on the Users tab:
 - Show wifi user what authorizing via SMS code
 - Show wifi user what authorizing via ticket
 - Filtering only disabled wifi users
 - Filtering only removed wifi users
Add new wifi user
Wifi operator can manualy add new user on hotspot RouterOS, account information in Mupsbox database, and genarate password by appropriate policy. In order for the program to add new user from your hotspot RouterOS, you must click on the ![]() , then the Add new wifi user window will open:
, then the Add new wifi user window will open:

- Login - The wifi user will use login for authorization on Hotspot RouterOS
- Surname - The surname of wifi user. Available for ticket authorization only
- Name - The name of wifi user. Available for ticket authorization only
- Patronym - The patronym of wifi user. Available for ticket authorization only
- Pasport № - The pasport number of wifi user. Available for ticket authorization only
The operator can modify WIFI connection and WIFI passwords policies on user creation step.
The WIFI connection policy:
- Connection days - Number of connection days that wifi user will remain authorized to Hotspot RouterOS
- Speed - The two-direction bandwidth for wifi users. There are predefined speed: 1M, 5M, 10M, unlim. It's possible use custom speed
- Traffic - The traffic restriction for wifi users. There are predefined traffic restrictions: unlim, 1Gb, 2Gb, 5Gb, 10Gb. It's possible to use custom traffic restriction
- Shared users - The number of users or wireless client devices what can work with one wifi user account
The WIFI password policy:
- Password length- Length of a password. By default 4 chars
- digits (0..9) - Requirement use digits in password
- low case letters (a..z) - Requirement use low case letters in a password
- high case letters (A..Z) - Requirement use high case letters in a password
- simbols (!@#$%^*) - Requirement use symbols "!@#$%^*" in password
When you click on Add User button, you will see the following window:

There is ticket can be printed. Print template can by modified by change wifi_ticket.rtf file what located in distributive folder.
Operators
This tab is used to associate Mupsbox users with Point. Point provides information about hotspot RouterOS devices and Gateways information.

Modify point for operator
Use double-click on the operator and choose an appropriate point.

Points
This tab is used for configuration points. Point is the association RouterOS device, which works as hotspot and config of authorization wifi users (Gateway information).

There are 5 buttons on the Points tab:
- - Add hotspot point
- - Delete hotspot point
- - Enable hotspot point
- - Disable hotspot point
- - Refresh window
When you click on Add hotspot point button, you will see the following window:

- Name - Name of the point
- Device - RouterOS device what in the list of Device module. RouterOS should be configurated as a hotspot
- Gateway - Set of authorization information. The gateway should be configurated before point creation
Gateways
This tab is used for configuration gateways. Gateway is a set of information on how wifi users will authentification on hotspot RouterOS.

There are 2 buttons on the Gateway tab:
- - Add gateway
- - Delete gateway
When you click on Add Gateway button, you will see the following window:

- Gateway name - unique Gateway name
- Message- The Message that wifi user will receive on a mobile device with SMS code. There is a requirement to use #wifipassword# inside text. It's variable will change on generate a password with an appropriate wifi password policy
- Mode - The Mode provides SMS authentification via the external provider or internal modem connected to RouterOS device
- External string - The string (web-link)of autentification your on external sms provider. There is a requirement to use #phonenumber# and #smsmessage# inside text. The variable #phonenumber# is number that sms will sent. The variable #smsmessage# is text of Message field, text that will recieved by wifi users
- RouterOS device - The RouterOS device that listed in Device module. The device will work as sms modem. There SMS model should be integrated or attached to RouterOS device
- Modem type - If set to class-0, then send class 0 SMS message. It is displayed immedeately and not stored in phone
- Modem port - The name of port from /port list that GSM modem is attached to
- Modem channel - Which modem channel to use for sending.
The WIFI connection policy is the same as in creation user process:
- Connection days - Number of connection days that wifi user will remain authorized to Hotspot RouterOS
- Speed - The two-direction bandwidth for wifi users. There are predefined speed: 1M, 5M, 10M, unlim. It's possible use custom speed
- Traffic - The traffic restriction for wifi users. There are predefined traffic restrictions: unlim, 1Gb, 2Gb, 5Gb, 10Gb. It's possible to use custom traffic restriction
- Shared users - The number of users or wireless client devices what can work with one wifi user account
The Gateway provides preflight check options like status, balance, and trying to send test SMS.
The Status string provides check variable options from the SMS provider if it's available.
The Balance string provides check balance options from the SMS provider if it's available.
The Phone number string provides check trying to send test SMS.
Events
The Events tab provides historical information about wifi user, their mobile devices, etc.

- ID - The event ID created by mupsbox
- Application time - The time that on mupsbox machine
- Router time - The time that on hotspot RouterOS
- Action - The description of event
- User Login - The name of User Login for the current event. The information will write if available for that event
- User Name - The name of User for the current event. The information will write if available for that event
- User Surname - The surname of User for the current event. The information will write if available for that event
- User Mac Address / IP - The Mac Address or IP of a wifi client device. The information will write if available for that event
- Point - The Point which event is present
- Gateway - The Gateway which event is present
Reports
The Reports tab provides agrigate or combination information about wifi user, their mobile devices, etc. The information can be exported in Excel format.

The first matrix provides information about wifi users with filtering options.
The second matrix provides information about the activity of wifi users with filtering time options.