Backup
Backup Module
How to
The module allows making tasks on the backup groups of RouterOS devices with the set parameters. In order for the module to work it is necessary to make sure that it is installed and running in Settings:
Jobs
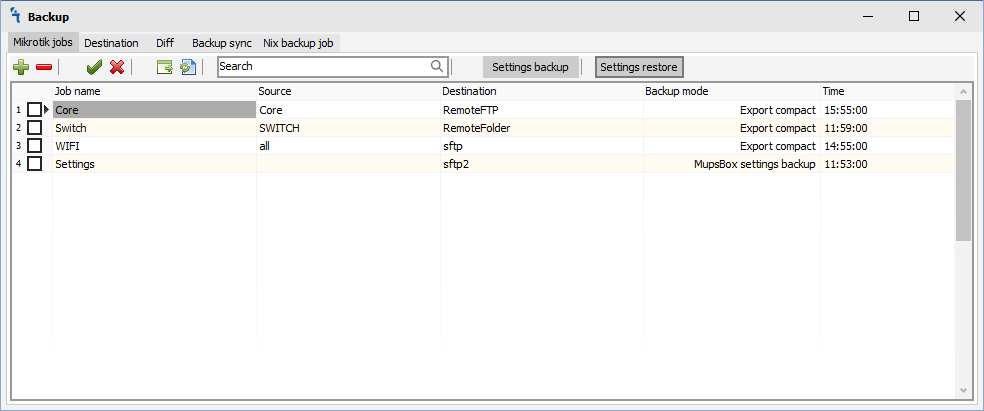
When you click on the Jobs tab, you will see the following window:
There are 4 buttons on the Jobs tab:
 - Add backup job
 - Delete backup job
 - Manual start backup job immediately
 - Refresh list of backup jobs
 - Save Backup Settings to file
 - Restore Backup Settings from file
Add backup job
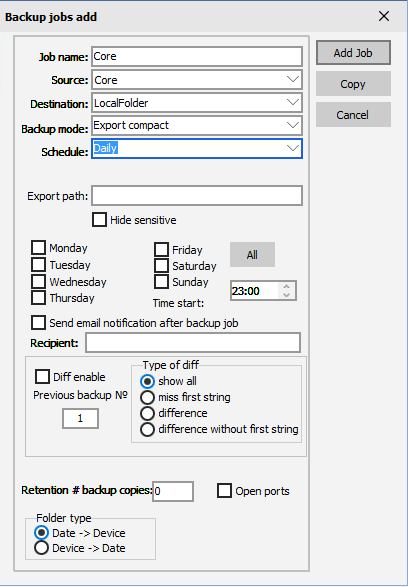
In order for the program create backup on your routers, you must click on the ![]() , then the Edit job window will open:
, then the Edit job window will open:
- Job name - name of the job
- Source - select a group of routers from which we want create backup data
- Destination - local or network place where backup copies will collected. First time Destination should be configured on Destination Tab
- Backup mode - there are three modes: system backup, export compact, export verbose for ROSv6 and above
- Schedule - there are three schedule modes: manual, daily, monthly
- Encryption - ecnryption string what new backup will be encrypted. For system backup only applied.
- Export path - Export not all backup configuration, only part backup configuration what start header of part backup configuration. For export compact and export verbose only applied.
If daily or monthly schedule mode was chosen backup service will automaticaly start. Backup service should be started.
The Daily backup provides start backup day or days of week:
The Monthly backup provides start backup day of week:
The backup module can send email notification every time when a backup job was finished. For that action option "send an email notification after backup job" should be marked. If the recipient field will blank, a global notification email will be used instead.
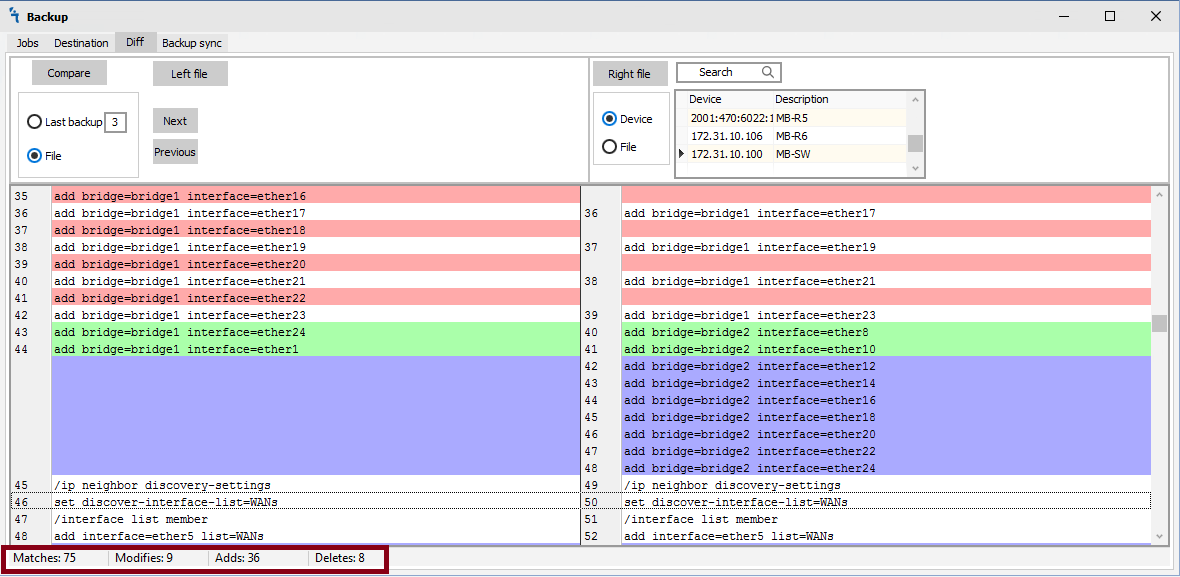
The backup module can show differential information only for export compact and export verbose backup mode by email notification. At the same time, a full backup will save on an appropriate backup destination. Differential information will be marked by different colors. There are the next differential options:
- Diff enable - enable a differential option for a backup job
- Previous backup № - backup job compare information between current backup and appropriate № backup. For Example, if Previous backup # chosen 3 for a daily backup job, differential information between current backup and 3 days ago backup will be saved.
- show all - send HTML file including all backup configuration by email notification.
- miss first string - same as "show all". The first string will not include in a report.
- difference - send HTML file differential backup configuration by email notification.
- miss first string - same as "difference". The first string will not include in a report.
Retention option can be used by the backup module for deletion old backup copies and keep disk space of backup destination on the same level. The number of retention copies provides to save that number on backup destination. Other copies will delete by the next running backup job.
Job History
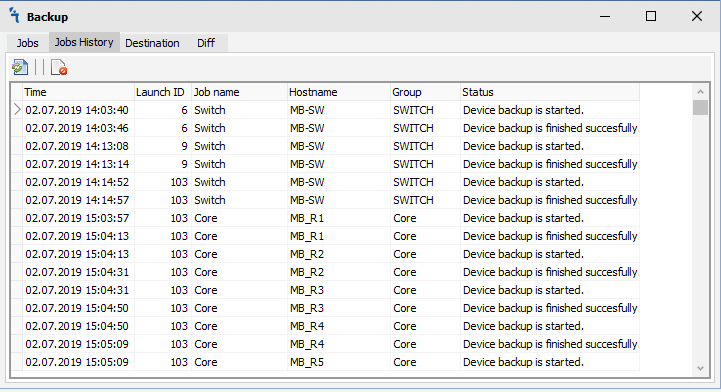
General information about a lunched job the backup module collects in a database and shows on the Job History tab. There are two buttons:
Destination
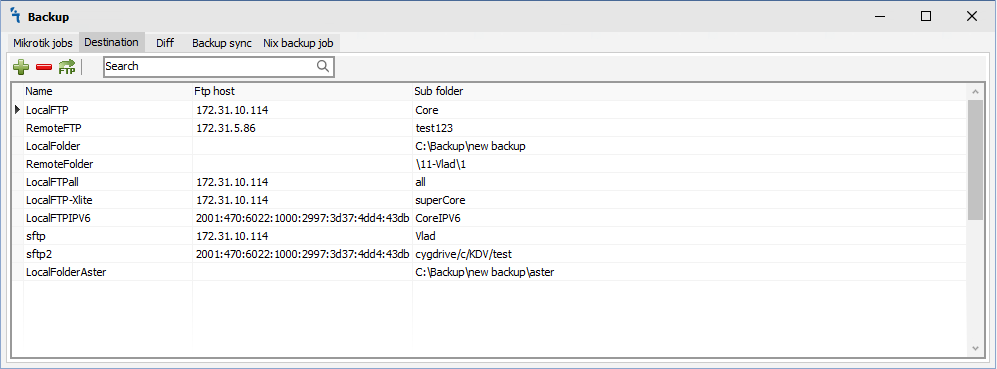
The location that will keep backup copies should be configured on Destination tab.
There are 3 buttons on the Jobs tab:
Add backup destination
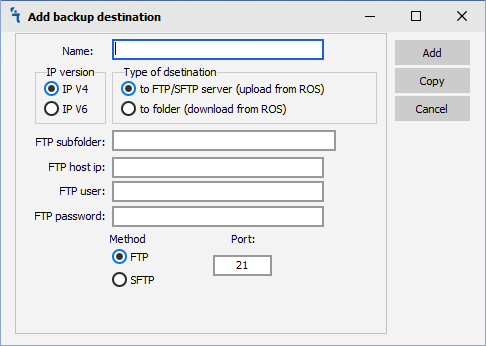
For create new backup destination, you must click on the ![]() , then the Edit destination window will open:
, then the Edit destination window will open:
- Name - name of the backup destination
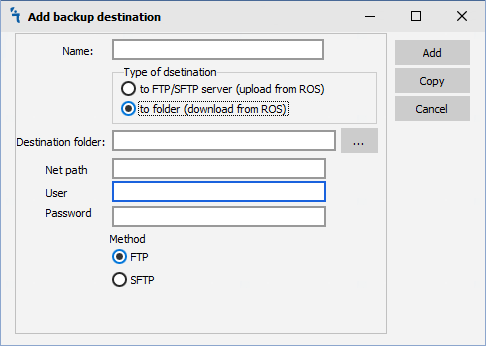
- Type of destination - There is destination can be ether to FTP server (screenshot above) or to network folder (screenshot below).
- Destination - local or network place where backup copies will collected. First time Destination should be configured on Destination Tab
- FTP port - port of FTP server.
- FTP subfolder - There is destination as subfolder of FTP server.
- FTP host ip - ip address of FTP server.
- FTP user - account to access to FTP server.
- FTP password - password of account to access to FTP server.
There is destination as network folder have next fields:
- Destination folder - the folder on network folder.
- Net path - network path to network folder.
- User - account to access to network folder.
- Password - password of account to access to network folder.
Diff
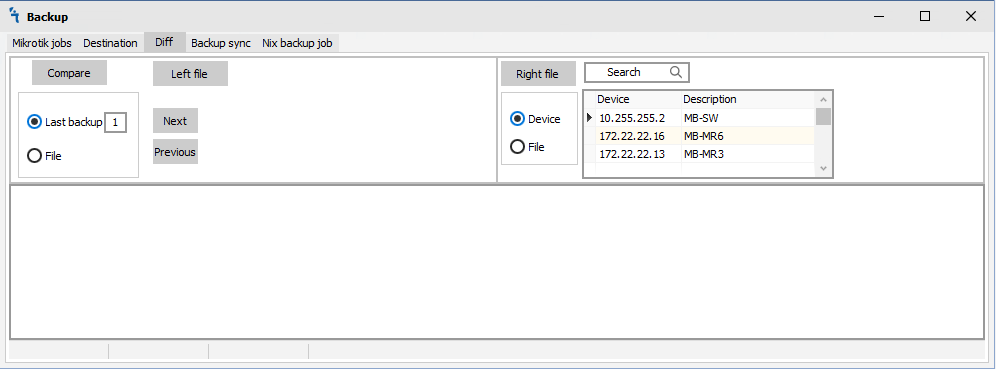
For compare different configuration the software has Diff tab. The Diff tab split windows into two parts. There is the next feature:
- Open backup file - the left file and/or right file.
- Use the last number of backup - the feature on the left side.
- Device - create and use to compare the current backup file. The feature on the right side.
The example of compare two configurations showed below:
